
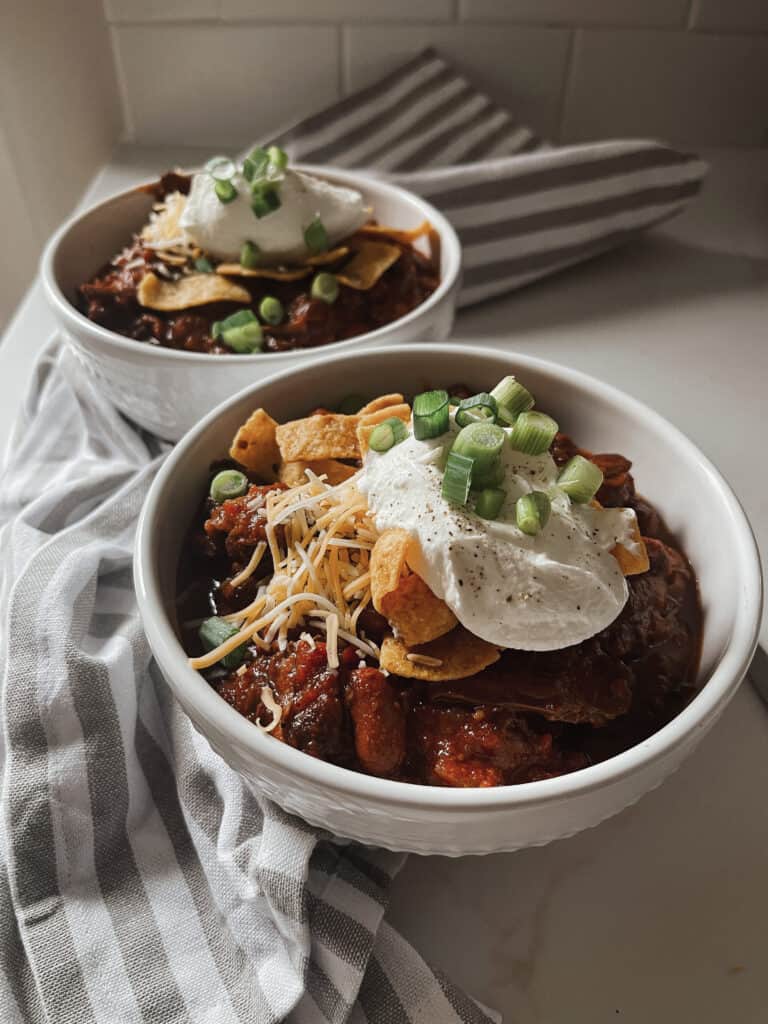
If you come over to our house on a fall or winter sunday, I can guarantee my husband will be making chili. From August to February, its chili season. This chipotle shredded beef chili is one we’ve been making over and over.
This chipotle shredded beef chili has deeper and richer flavor than my classic turkey chili. The beef is slow cooked in a rich and spiced sauce until it is tender and falling apart. If you love tender, pulled apart, melt in your mouth beef, then this shredded beef chilis is right up your alley! We love adding different beans and veggies make this a whole, complete pulled beef chili meal. I love slow cooking a huge pot of chili cooking all day on Sunday. Plus, I love eating leftovers through the week to make my week easier!
This easy chili recipe is a great option for an easy gluten free weeknight dinner, a fun game day addition or a simple meal prep for the week, just like my gluten free chicken casserole with tomato sauce, and my dairy free white chicken chili.
why you'll love this recipe
- It is allergy friendly recipe. It is naturally gluten free and naturally dairy free.
- Not only is this recipe delicious, but it's also a one-pot meal! One pot meals mean less cleanup and I absolutely hate doing dishes…especially on sundays.
- This dinner is perfect for those cozy winter nights! It is the best when I want a warm and cozy meal on the couch at night.
- Total comfort food. Sometimes on a sunday night we just want a bowl of a cozy chili.
- I love bringing this pulled beef chili to a party, tailgate or potluck! The best part is no one ever knows it is actually gluten free, and I get to safely enjoy it without having to tell everyone I'm gluten free! Its a win win.
- One of the best perks is that this is an easy freezer friendly meal! It is a great option for a simple meal prep! I love having this shredded beef Chili ready to go when I need to just pull a dinner out of the freezer and heat it up quick. I often make a double batch just so I can freeze some shredded beef Chili for another cozy weekend when I'm feeling lazy.
ingredients & substitutions
Beef: This Chipotle shredded beef chili uses beef chuck, a flavorful cut good for stewing. I love using this type of beef the best so it gets shredded but if you need to save time you can also used ground beef.
Broth: I like using bone broth but you can use beef broth or beef stock as well.
Tomatoes: Canned diced tomatoes with chilis are our go-to to add a chunky tomato base with a touch of heat. You can use regular diced tomatoes if you don’t like spice. Tomato sauce adds more liquid and tomato flavor.
Veggies: Bell peppers and yellow onion or red onion add sweetness and texture. Fire-roasted tomatoes add texture and flavor. You can use any color bell pepper or another veggie like celery or zucchini. Garlic adds a savory taste to the pulled beef chili. The more veggies the better if you ask me!
Beans: red kidney beans and black beans add protein and fiber. You can use pinto beans, black soy beans, chili beans or another bean you like. All these options are available at your local grocery store.
Spices: Chili powder is the main spice, giving the chili with shredded beef its characteristic flavor. You can use mild chili powder if desired. Smoked paprika adds a smoky flavor. You can use regular paprika if you don’t have smoked. Oregano and cumin add warmth. You can skip the cumin if you don’t like it. Onion powder adds onion flavor without chopping. Red pepper flakes and cayenne pepper adjust the spice level. Add a little at a time and taste as you go. Feel free to add other seasonings like garlic powder, chili seasoning or dried chiles to your shredded beef chili!
directions
Step 1
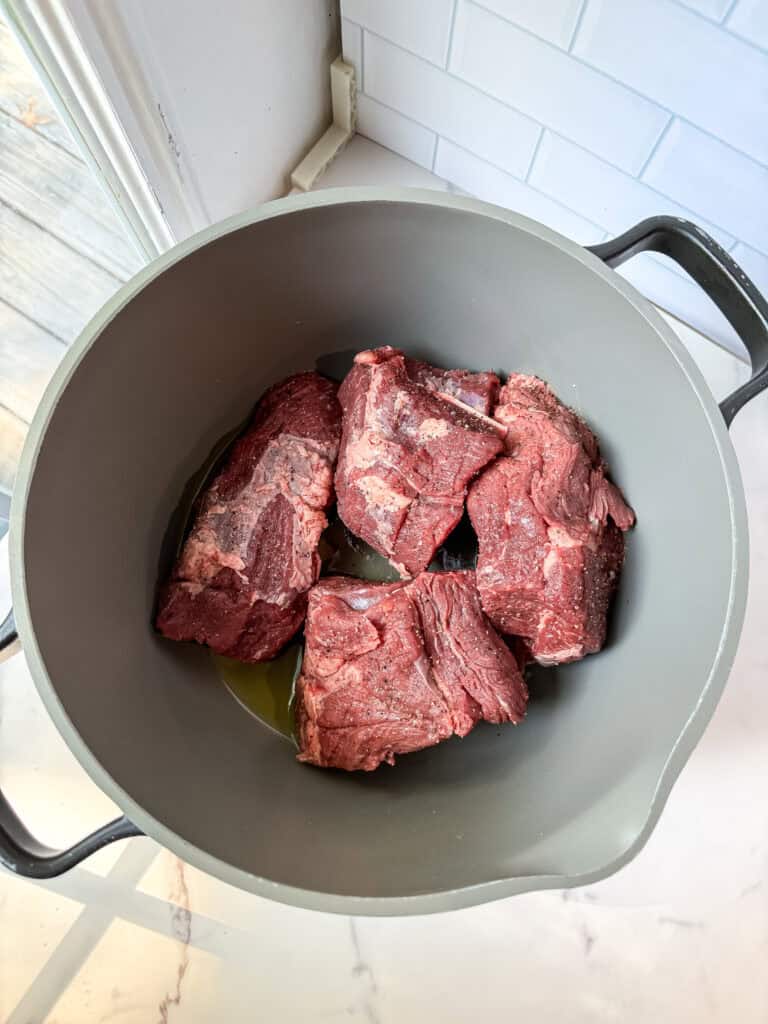
On a cutting board, cut the beef into 4-5 large pieces. In a large pot, add olive oil and beef pieces. Season generously with salt and pepper.
Step 2
Brown the beef on high for 5-7 minutes until outside edges are browned. Remove the meat from the pot and set aside.
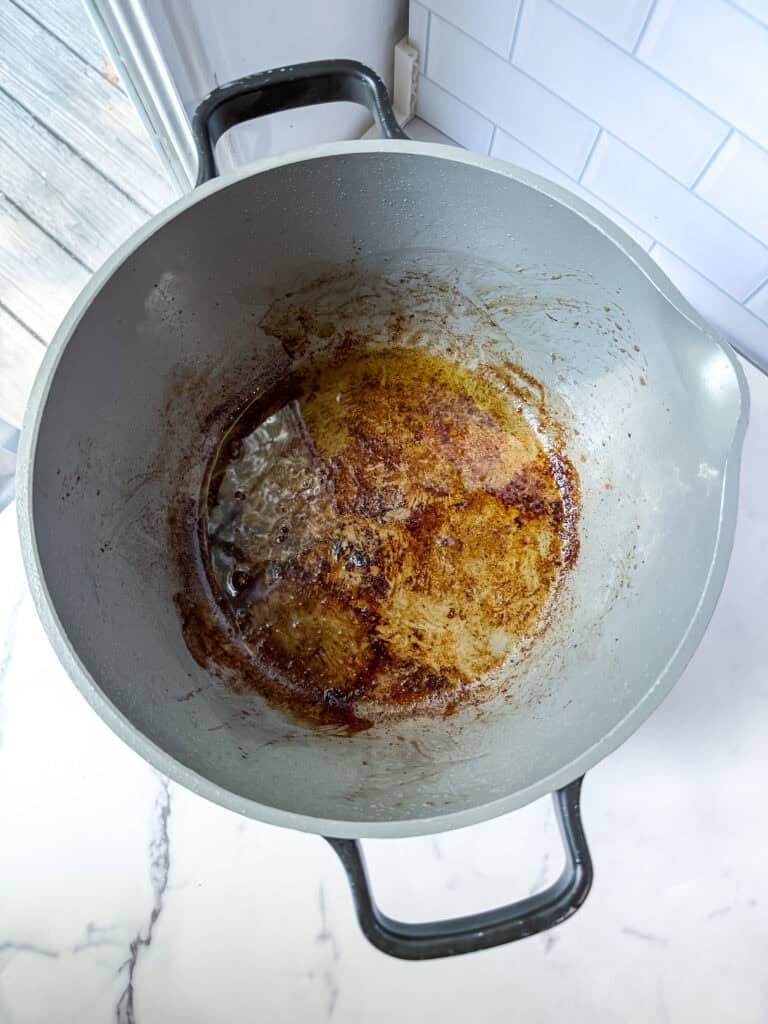
Step 3
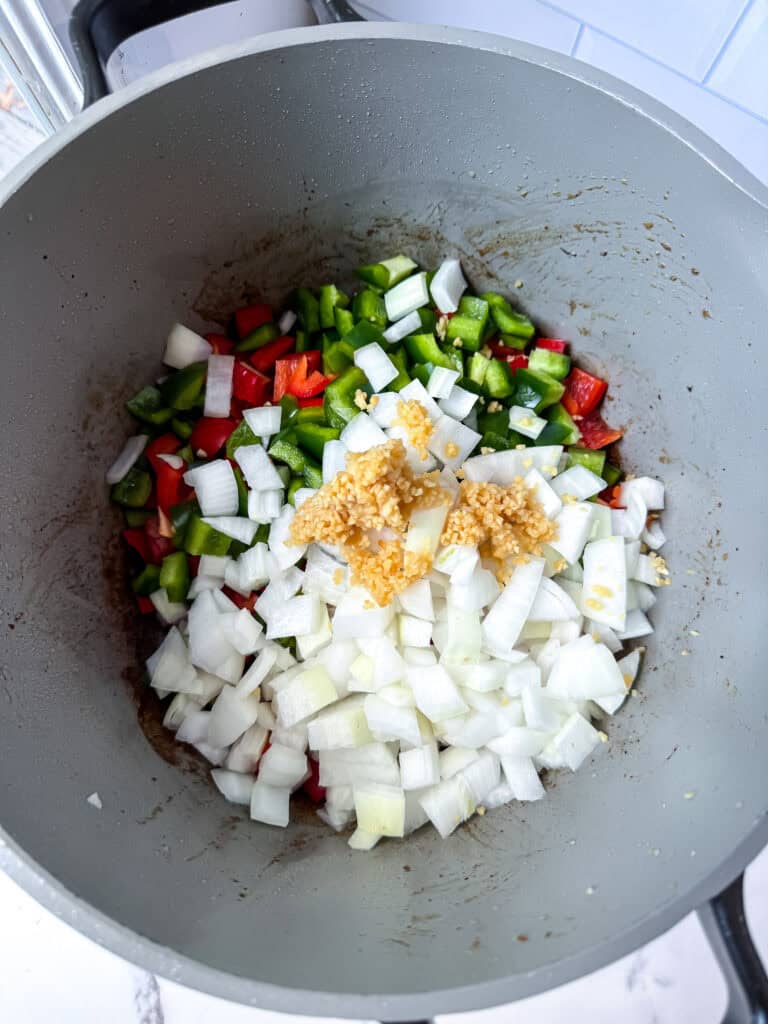
On a cleaned cutting board, dice the onions and peppers into bite size pieces. Without washing the beef pot, add your peppers and onions and garlic. This way, your peppers, onions and garlic are cooking in all the good juices left over from the beef. Cook for 7-11 minutues or until soft, translucent and cooked.
Step 4
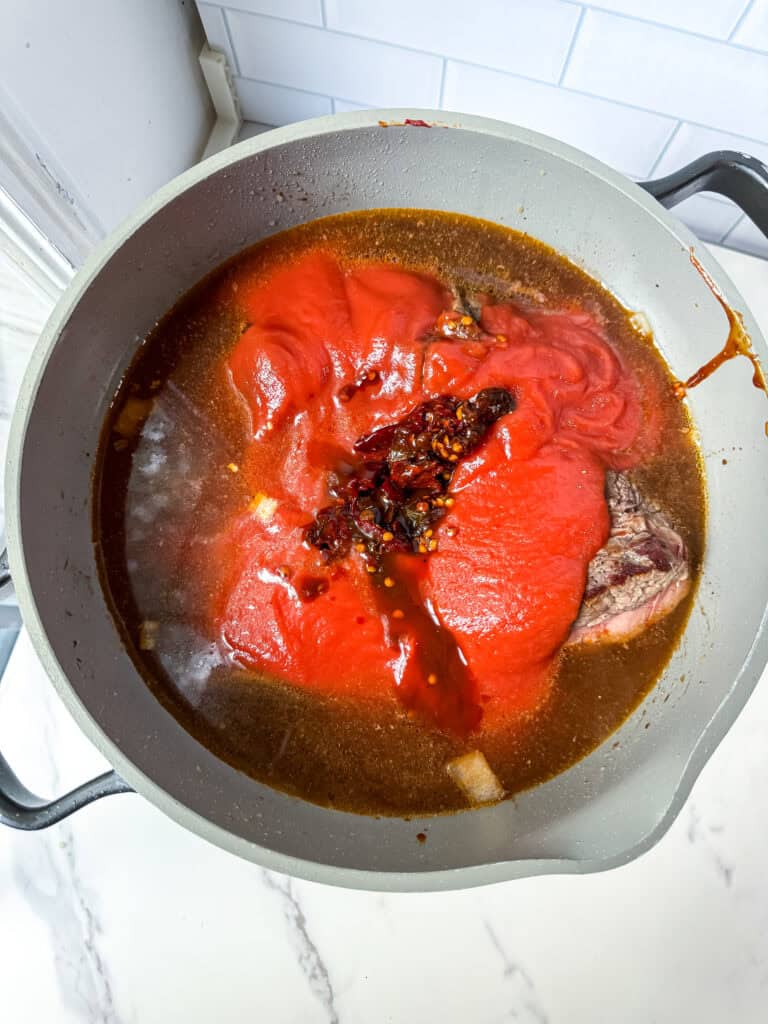
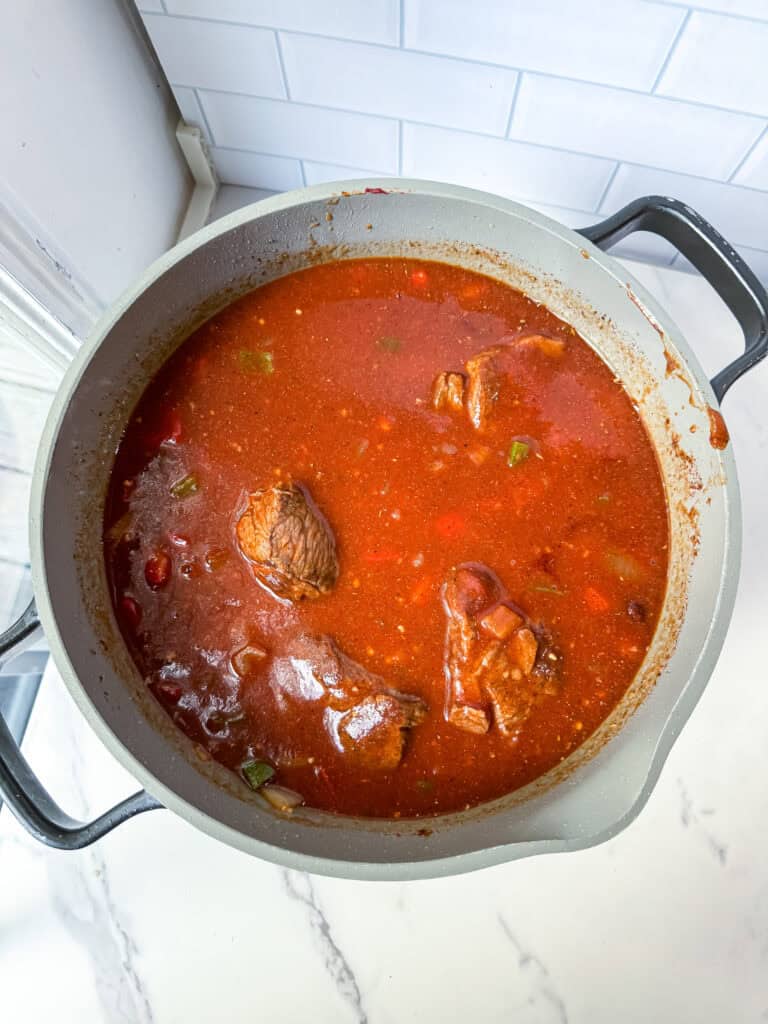
Add the beef back to the pot. Add the tomato sauce, paste, broth and the diced tomatoes into the pot.

Step 5
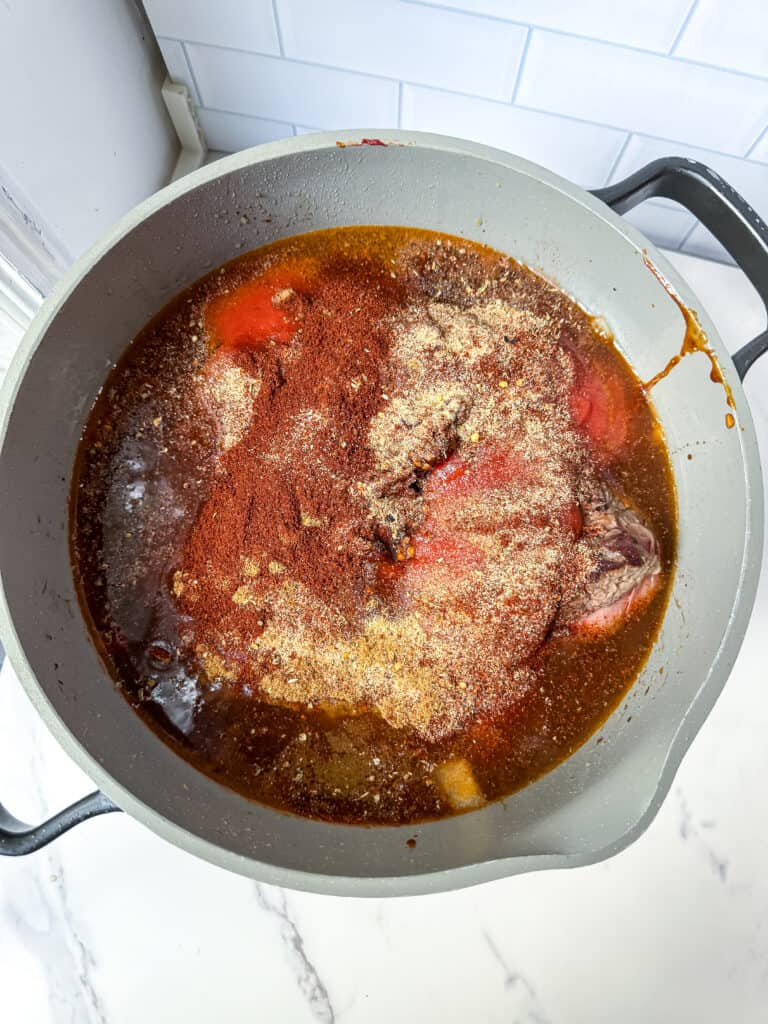
Next, add your seasonings.
Step 6
On a cutting board, dice a chipotle pepper into as small of pieces as possible. Add to pot.
Step 7
Finally, add the beans to the shredded beef chili. Salt and pepper to taste. Cover and let simmer on low for 2-4 hours.
expert tips & tricks
- how long to cook the pulled beef chili: For best results, I always recommend to leave the shredded beef chili simmering on the store on low heat for at least 2-4 hours to help develop the flavors and enhance the cozy chili spices. You can even let the hearty chili simmer for up to 6 hours. This slow cooking is the key to making the chili, especially this chili with shredded beef. The slower you cook, the more tender the beef will be and the thicker the chili broth will be.
- a great way to make this leaner: For a leaner, less fatty option, I recommend trimming any pieces of fat off the beef pieces before adding it to the chili. Once it is cooked its easier to shred apart but harder to remove any excesss fat. Leaving some fat is ideal for flavoring but if you want to trim it off the chili will be healthier and have less fat for health purposes.
- Gently pull apart the stew meat before serving to make the whole chili thicker and more mixed together. You always want a little piece of every ingredient in each bite, not a whole chunk of beef alone.
- You can cook this shredded beef chili in a slow cooker, pressure cooker, crock pot or instant pot but the cooking time will vary.
how to serve & store
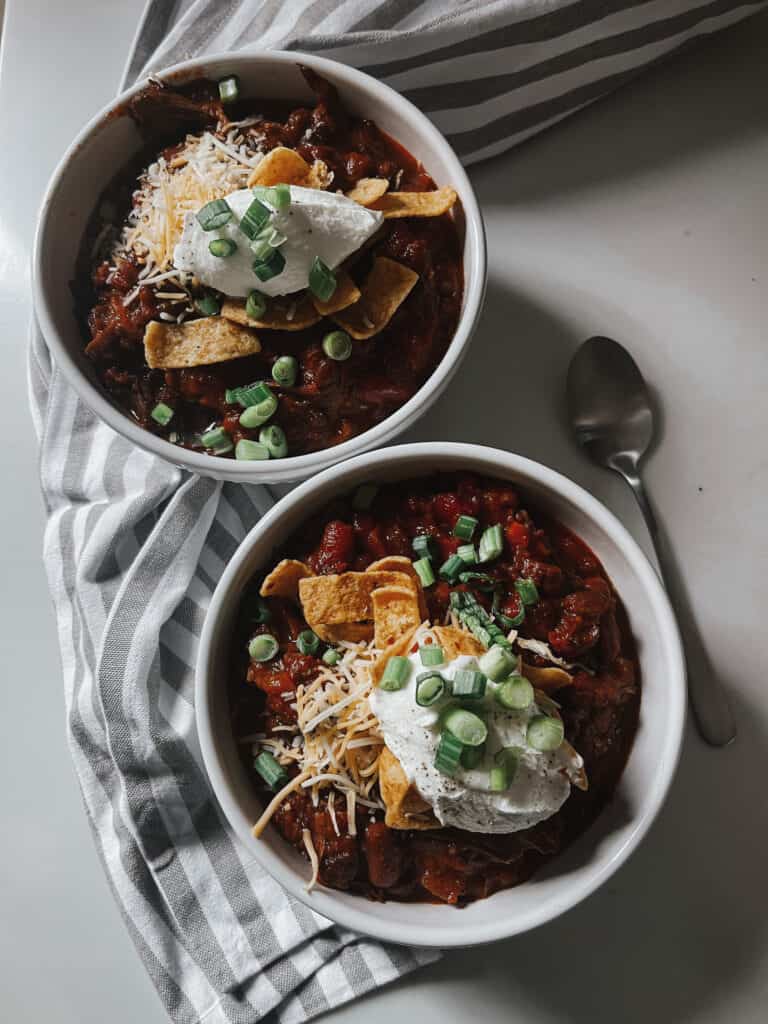
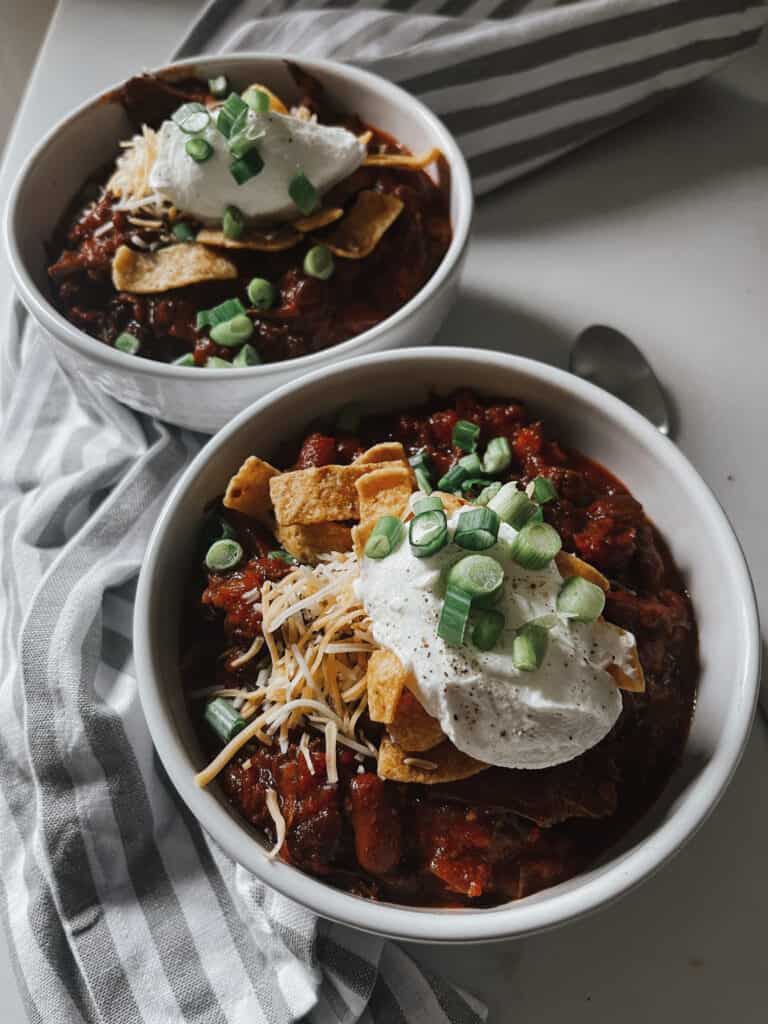
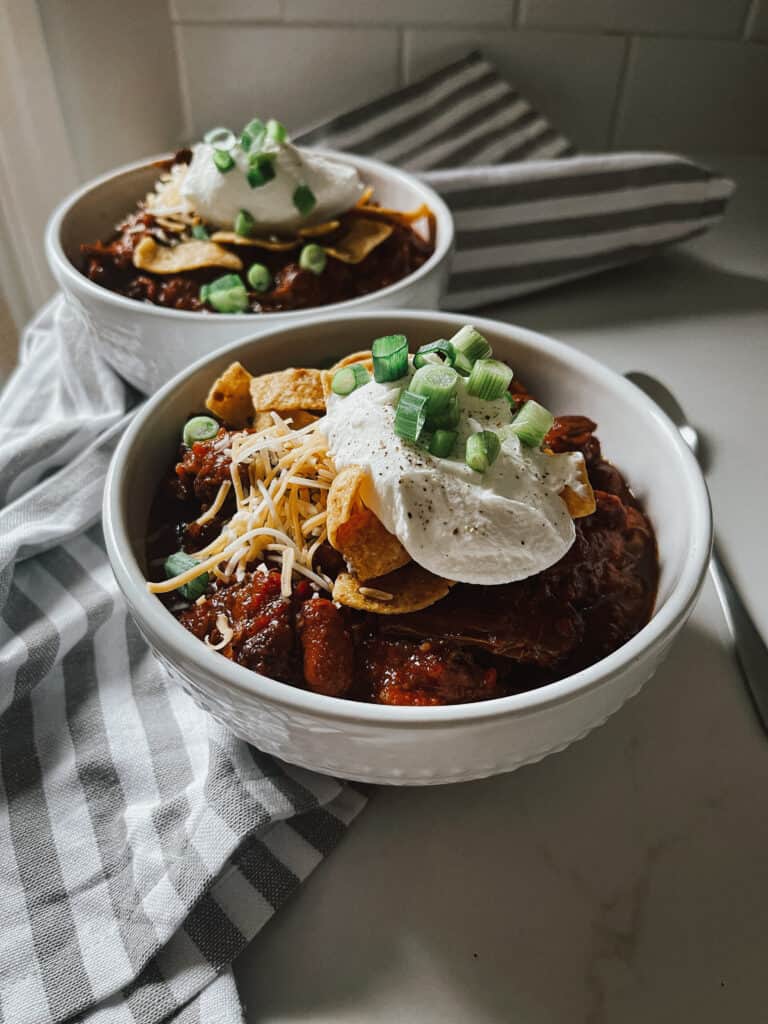
Serve your Chipotle shredded beef chili hot with your favorite toppings like shredded cheese, sour cream, chopped onions, cilantro, or avocado.
Leftover chili with shredded beef can be stored in an airtight container in the fridge for up to 4 days. Chili freezes well too! Let it cool completely, then portion it into freezer-safe containers. It will keep for up to 3 months. Thaw overnight in the refrigerator before reheating.
For meal prep, portion the chili with shredded beef into single-serve containers after cooking. Label them with the date and freeze for easy grab-and-go lunches throughout the week. Reheat in the microwave or on the stovetop until heated through.
Looking for more allergy friendly easy recipe?


If you make this recipe and enjoyed it, I would really appreciate a review! You can find me on Instagram, Facebook, Tik Tok and Pinterest. Purchase my cookbook Easy Allergy Free Cooking. Join my exclusive weeknight meal plan group for 5 weekly 30-minute dinner recipes plus a weekly grocery shopping list. The weeknight meal plan also has an accompanying podcast as well! I would love for you to follow along!

Chipotle shredded beef chili (Gluten free, Diary free)
Ingredients
- 2 1/2 lbs of beef chuck
- 1 cup beef broth
- 1 14 oz can of diced tomatoes diced fire roasted with chilis from trader joes is our favorite!
- 1 28 oz can of tomato sauce
- 1 bell pepper diced
- 1 onion diced
- 1 tbsp tomato paste
- 1 14 oz Kidney beans
- 2 tbsp chipotle chilis minced
- 1 14 oz Black beans
- 4 cloves Garlic minced
- 2 tbsp chili powder dried
- 1 tbsp paprika smoked or regular
- 1 tsp oregano dried
- 1/2 tbsp of cumin less if you’re Andrew and dont like the flavor
- 1 tbsp onion powder dried
- Red pepper flakes to taste
- Cayenne pepper to taste
- Salt + pepper to taste
Instructions
- On a cutting board, cut the beef into 4-5 large pieces. In a large pot, add olive oil and beef pieces. Season generously with salt and pepper.
- Brown the beef on high for 5-7 minutes until outside edges are browned.
- Remove the meat from the pot and set aside.
- On a cleaned cutting board, dice the onions and peppers into bite size pieces. Without washing the beef pot, add your peppers and onions and garlic. This way, your peppers, onions and garlic are cooking in all the good juices left over from the beef. Cook for 7-11 minutues or until soft, translucent and cooked.
- Add the beef back to the pot.
- Add the tomato sauce, tomato paste, broth and the diced tomatoes into the pot.
- Next, add your seasonings.
- On a cutting board, dice a chipotle pepper into as small of pieces as possible. Add to pot.
- Finally, add the beans.
- Salt and pepper to taste.
- Cover and let simmer on low for 2-4 hours.
Notes
- how long to cook the chili: For best results, I always recommend to leave the pot of chili simmering on the store on low heat for at least 2-4 hours to help develop the flavors and enhance the cozy chili spices. You can even let the hearty chili simmer for up to 6 hours. This slow cooking is the key to making the chili, especially this chili with shredded beef. The slower you cook, the more tender the beef will be and the thicker the chili broth will be.
- a great way to make this healthier: For a leaner, less fatty option, I recommend trimming any pieces of fat off the beef pieces before adding it to the chili. Once it is cooked its easier to shred apart but harder to remove any excesss fat. Leaving some fat is ideal for flavoring but if you want to trim it off the chili will be healthier and have less fat for health purposes.
- how to make this vegan: To make this chili with shredded beef vegan, replace the beef with 2-3 extra cups of beans or 2 cups of shredded jackfruit! Replace the beef broth with vegetable broth.
Love this recipe? You can sign up here to receive easy meal plans, exclusive new recipes and updates!
Do you drain and rinse the beans?
Yes! I do!